

Right behind Your First Ruby Gem, here’s a walkthrough of creating your first Objective-C CocoaPod. Now, I must admit that after only two months of Objective-C programming, I am not nearly an expert. So I enlisted Orta from CocoaPods to stand behind my back and poke me with a stick whenever I did something wrong. It’s also important to note that there’s a lot of development going on in CocoaPods and my walkthrough represents the current state of affairs as of February 2014.
TL;DR
This was really easy. Open-source in Objective-C FTW!
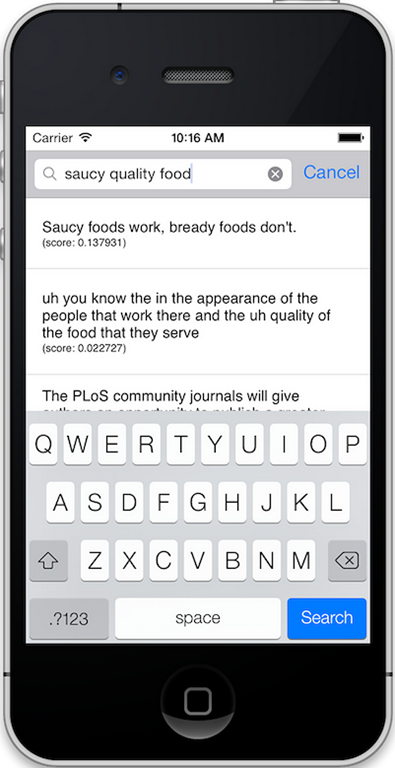
I wrote objc-ngram, a small n-gram library. For example, you could use it as a rudimentary full text search engine.
Create a Pod
Get CocoaPods by running gem install cocoapods. Create a pod.
$ pod lib create objc-ngram

Creating `objc-ngram` Pod
Configuring template
To learn more about the template see `https://github.com/CocoaPods/pod-template`.
To learn more about creating a new pod, see `https://guides.cocoapods.org/making/making-a-cocoapod`.
This creates an objc-ngram folder with a bunch of files. As of now, it’s missing a Gemfile, that I have created manually_._
source 'https://rubygems.org'

gem 'cocoapods'
Run bundle install, which will generate a Gemfile.lock _and a _.bundle folder. We don’t intend to lock the version of CocoaPods, so add Gemfile.lock and .bundle to .gitignore.
Create a Demo/Test Project
Let’s get rid of the default project created by pod and re-create one that will reference our pod as a development pod.
$ rm -rf Project
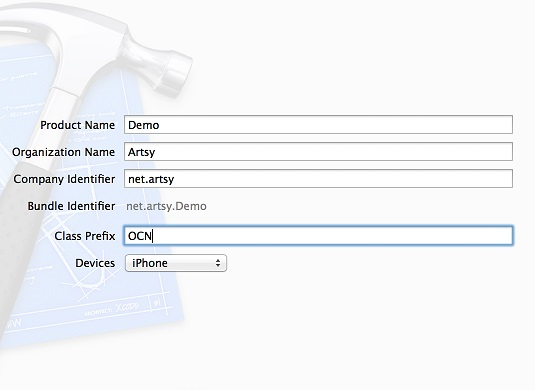
Create a new iOS Single View Application project and place it into the folder created above (objc-ngram).
Inside the Demo folder, create a Podfile. Yes, we’re going to write tests, using Specta and Expecta.
pod "objc-ngram", :path => "../objc-ngram.podspec"

target "DemoTests" do
  pod 'Specta', '~> 0.2.1'
  pod 'Expecta', '~> 0.2.3'
end
Run pod install.
Demo> $ pod install
Analyzing dependencies
Fetching podspec for `objc-ngram` from `../objc-ngram.podspec`
Downloading dependencies
Installing Expecta (0.2.3)
Installing Specta (0.2.1)
Installing objc-ngram (0.1.0)
Generating Pods project
Integrating client project
[!] From now on use `Demo.xcworkspace`.
Add the Demo/Pods folder, which includes all the pods installed from pod install, to .gitignore.
Reopen the newly generated Demo.xcworkspace from XCode. The project should build and run.
Housekeeping
This is a good opportunity to update README, CHANGELOG and LICENSE.
Create a repository on Github and push the code you have so far.
Continuous Integration
There’s no excuse not to have tests or continuous integration for an open-source project.
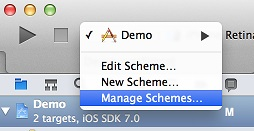
In XCode, open Manage Schemes _and make the _Demo scheme shared.
Create a .travis.yml file at the root of your project.
language: objective-c

before_script:
  - export LANG=en_US.UTF-8
  - cd Demo ; pod install ; cd ..

xcode_workspace: Demo/Demo.xcworkspace

xcode_scheme: Demo

xcode_sdk: iphonesimulator
Enable the project to build in Travis-CI and add a build status icon to the README.

Code & Tests
Write code and tests. Code goes into the Classes folder. Tests go into the Demo project. Note, that in order for new class files to be visible to the project you must remember to rerun pod install. Pod will also enable ARC for those new files, automatically.
I always write tests and start with very obvious ones for each and every new class. This serves as a placeholder for more useful functionality.
#define EXP_SHORTHAND

#include <Specta/Specta.h>
#include <Expecta/Expecta.h>
#include <objc-ngram/OCNDictionary.h>

SpecBegin(OCNDictionarySpec)

__block OCNDictionary *dict = nil;

describe(@"default width", ^{
    beforeEach(^{
        dict = [OCNDictionary dictionary];
    });

    it(@"creates an instance", ^{
        expect(dict).toNot.beNil();
    });
});

SpecEnd
CocoaPods lets you easily try pods with pod try, so the Demo project should also do something useful and visually stimulating.
Releasing the Pod
Run pod lib lint and fix any issues.
Run pod spec lint and make sure the project version looks right. You should see an error about a tag missing.
[!] Pod::Executable fetch origin tags/1.0.0 2>&1
fatal: Couldn't find remote ref tags/1.0.0
Once ready, tag 1.0.0 and push it to Github.
git tag 1.0.0
git push --tags
Clone https://github.com/cocoapods/specs. Create a versioned folder under specs, eg. specs/dblock/objc-ngram/1.0.0. Place the .podspec file from your project there. Check that the version in .podspec matches the folder name. Create a branch, commit the change and push it to your fork. Make a pull request to https://github.com/CocoaPods/specs, mine was https://github.com/CocoaPods/Specs/pull/8606.
Test Drive
Once the pull request has been merged, try your pod.
pod repo update
pod try objc-ngram
Full source code for objc-ngram is in https://github.com/dblock/objc-ngram.